CSS BASIC STRUCTURE
Your first CSS website
Installing VS Code
- Go to Google (or any preferred browser).
- Type Visual studio code download
- Click on download and install it as per your OS
- After the installation is done, you need to install the Live Server extension to view the changes you make to your website.
You can refer to this link in case you have any doubts about the installation- HTML Tutorial: Installing VS Code & Live Server | Web Development Tutorials #2
Which Browser should I use for web development?
In general, you can use any web browser that is supported on your device. The most common of these are-
- Chrome
- Microsoft Edge
- Safari
- Firefox
- Brave
But as per my personal advice, the Firefox browser gives the best usability and features especially for a new user. In fact, this tutorial will use Firefox to show the code outputs on our website.
Your first CSS website
So, if you have successfully followed the above steps you can open vs code and create a new file with the name “first.html”. I assume you’ve enough knowledge so far about HTML to understand the working of HTML emmet and tags.
In case you do not feel confident with CSS, you can skim through this tutorial for a refresher.
https://www.codewithharry.com/tutorial/html-home/
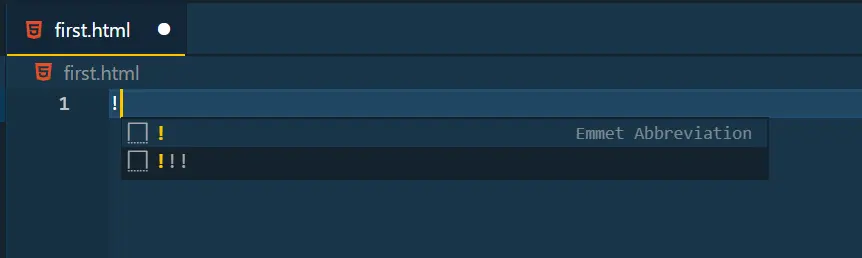
Now once you have created an HTML file, type “!” and enter to use the emmet for the default HTML website.
Now once you have created an HTML file, type “!” and enter to use the emmet for the default HTML website.
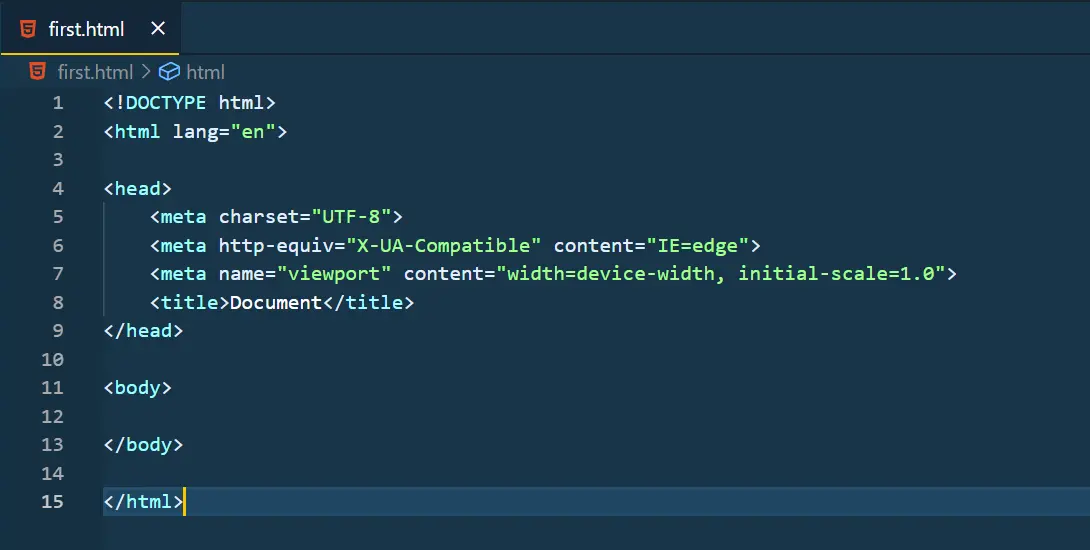
This code would then look something like this.
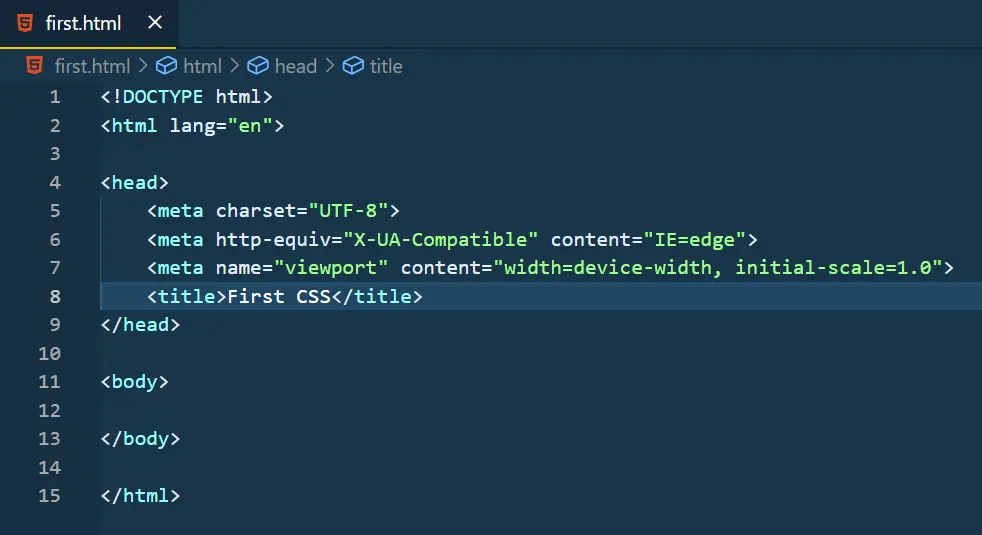
Rename the title to “First CSS”. This is the title that would be displayed at the top of the website.
Now let’s see the output of this code. Remember we had installed a live server extension earlier, you would see an icon on the bottom of the tray in VS code named “Go live”. You can also right-click to select open with Live Server to run the code.
This is how this website would look like without any text or attributes.
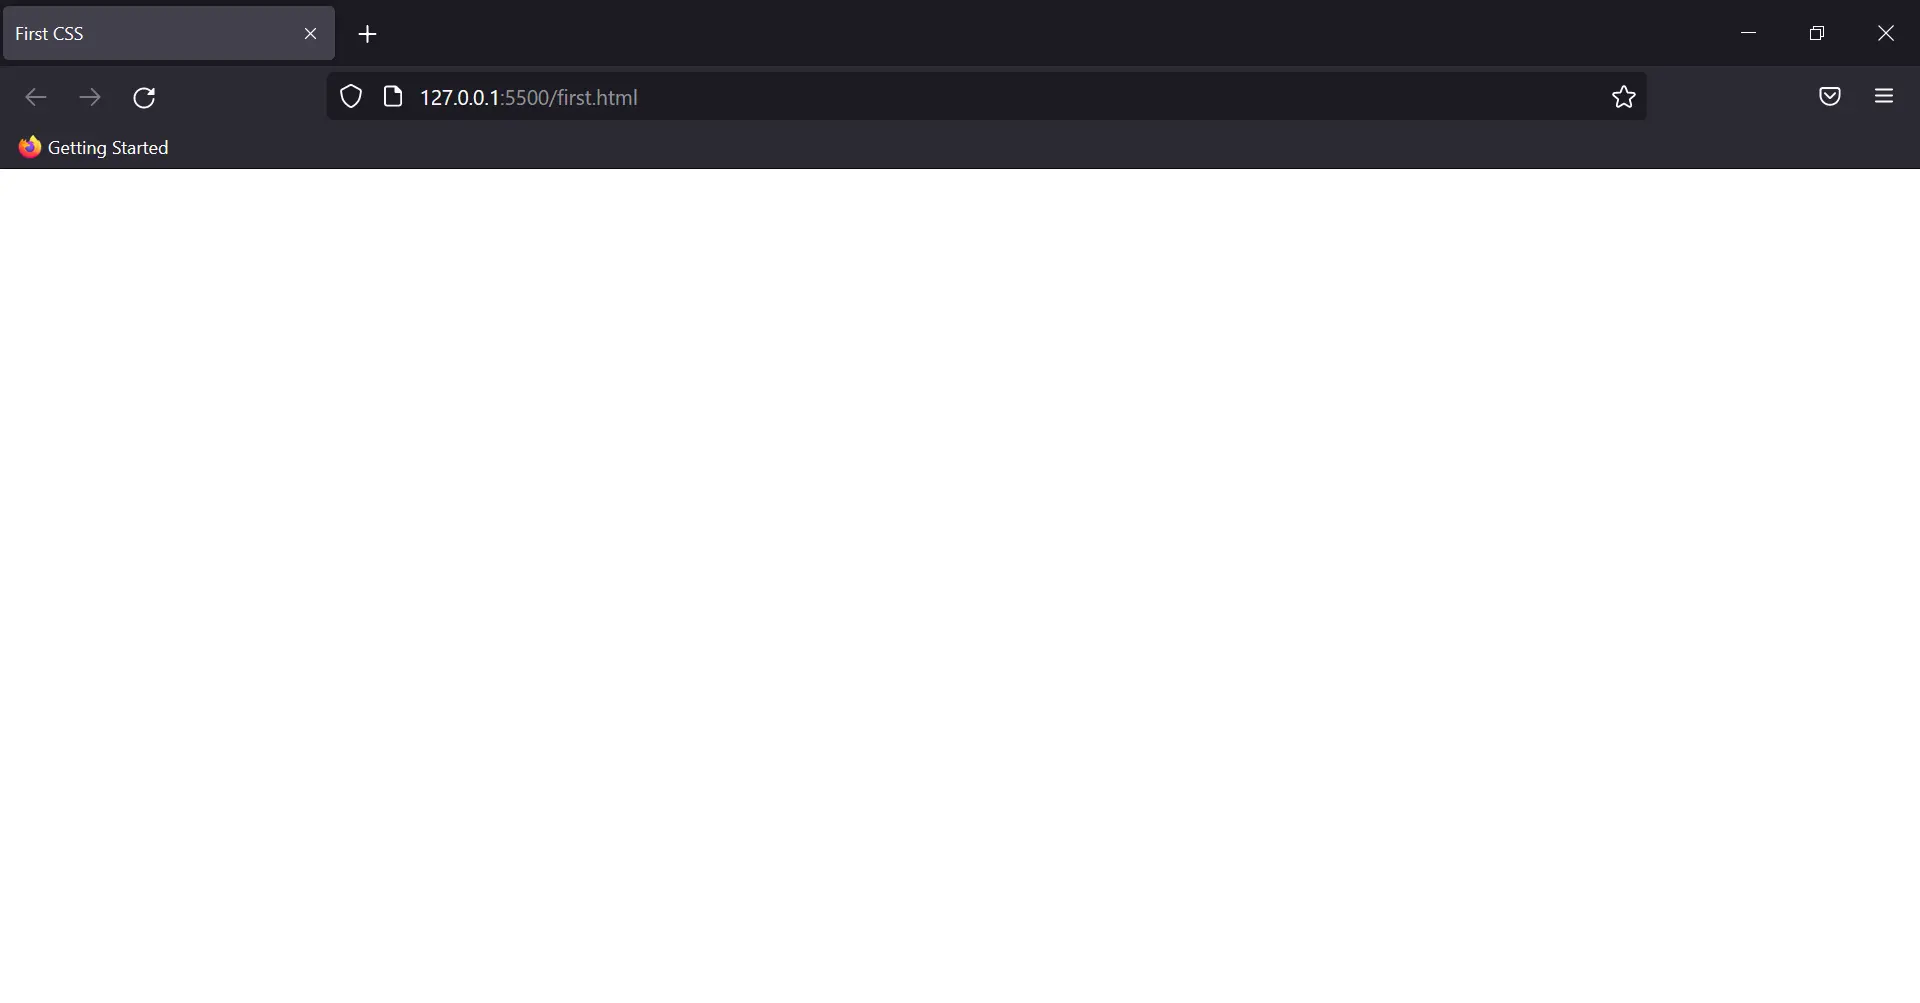
You can see here, that the title of the website is the only change we made. This is what an empty HTML website looks like. Now let’s add some HTML text and try styling that with CSS.
In the body tag, write anything you want to. Something like this-

Now let’s add some styling. Though there are many ways to add CSS to an HTML website, we’ll look at them later. For now, in the head tag create a tag with the name style.
Add the body tag there, and finally, you’re going to add now your first CSS property.
Type the following lines-
Let’s see the output of this code first, which will give you half of the explanation of what exactly happened here.
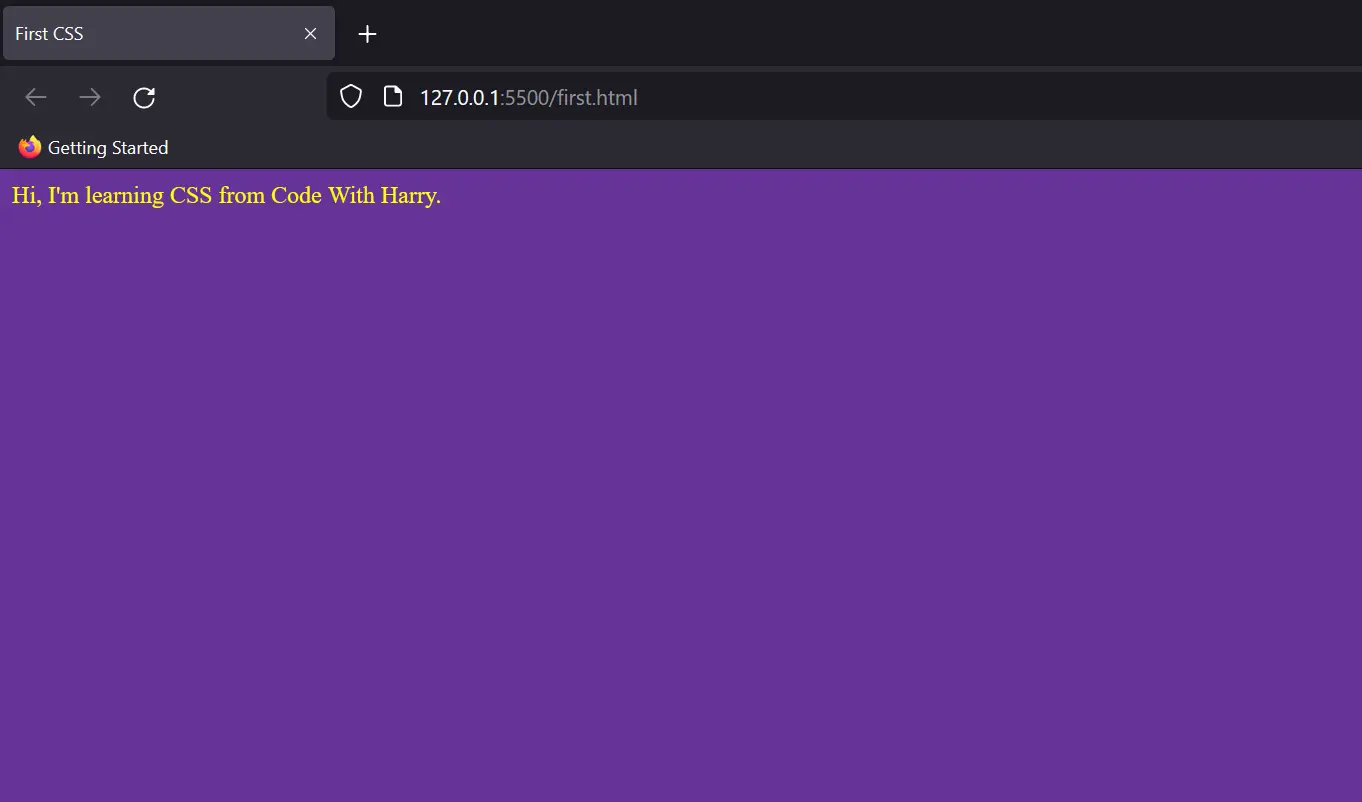
Pat yourself on the back! You’ve begun your journey with CSS. Throughout these tutorials, you’ll get better clarity about other properties as well.
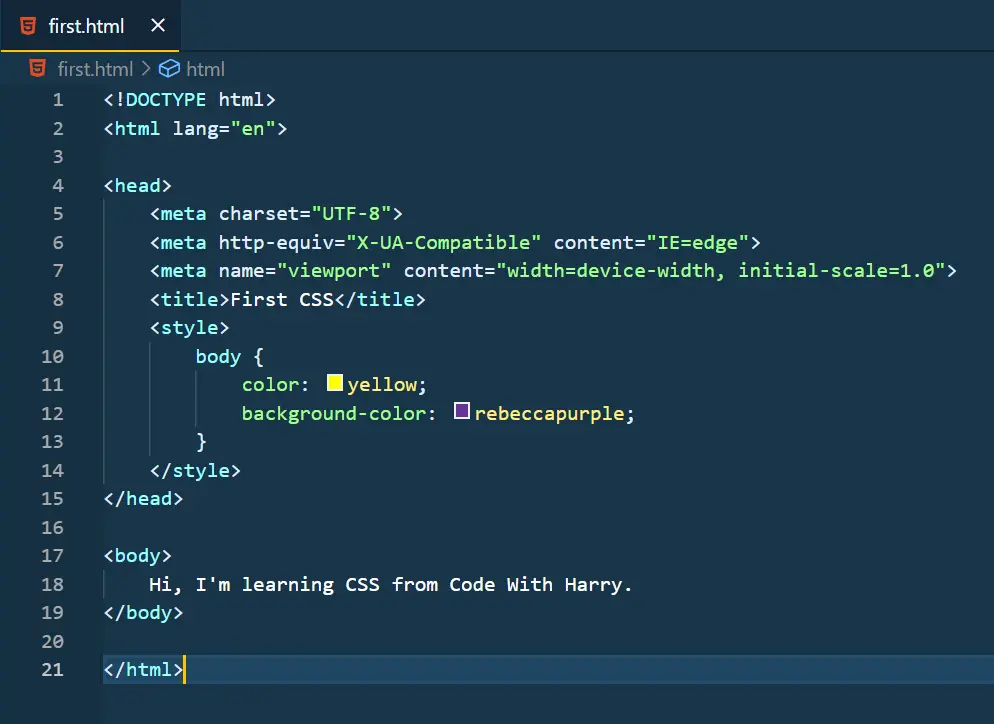
Coming back to this code, here’s the whole code for you.
To style any piece of code in CSS we need to select that (we selected body tag here). There are many other ways to do so as well. So just be patient and join your Harry Bhai to master CSS from Scratch.
How CSS works?
We wrote our first CSS style but still, the things wouldn’t be very much clear to an amateur person. Let’s look at how CSS works on the DOM model.
DOM model - Document Object Model
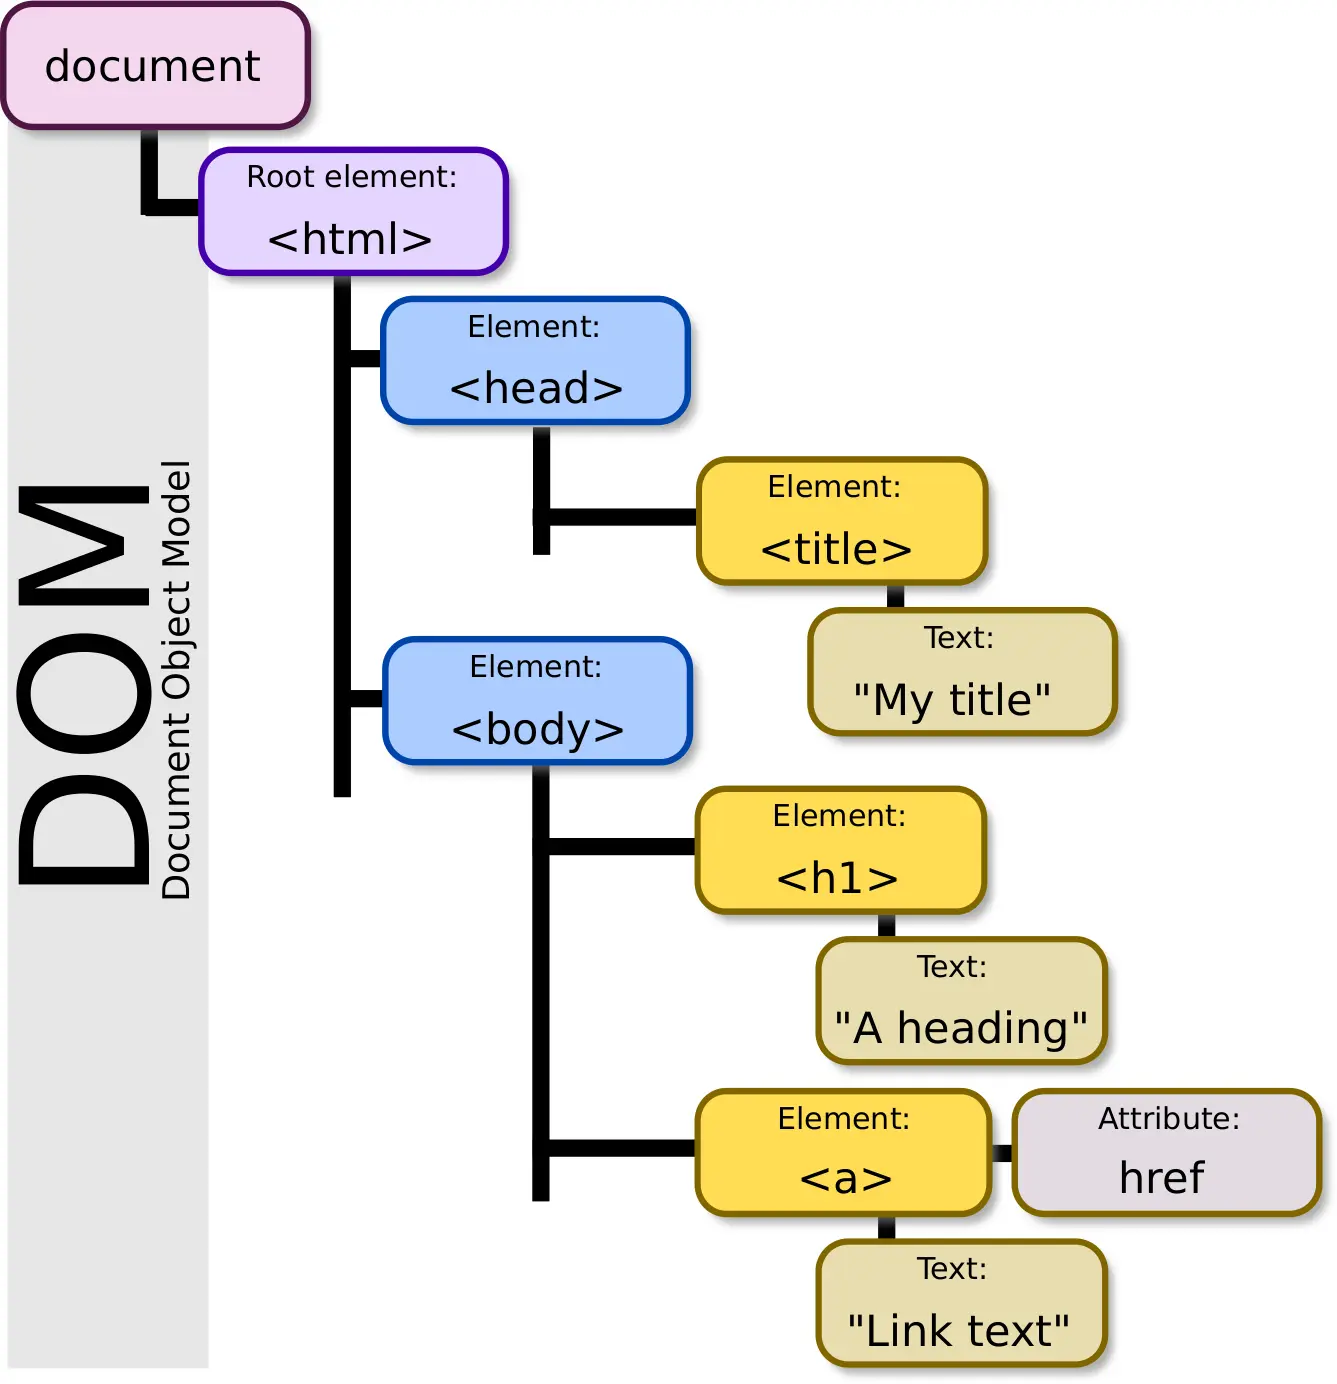
Source: Wikipedia
Just like how any artist makes a structure of his art, similarly, when our website is loaded in the browser it creates a structure to manage the execution of different tags of HTML.
Using DOM, HTML, as well as CSS of the web page, can be accessed along with the behaviour of the HTML elements. So, Document Object Model is a sort of API that represents and interacts with HTML documents.
Working of CSS
So basically after the DOM model is created in HTML, the browser parses CSS to the selectors we used (you’ll learn more about selectors in a while). The properties or the rules written in CSS are then applied to individual spans.
To know more about the document structure you can refer to this as well:
https://www.codewithharry.com/tutorial/html-document-structure/
Ways to add CSS
So, there are mainly three ways to add CSS to any HTML document. One of the ways, we have already seen.
Inline CSS:
In this method, we can simply add CSS to the particular HTML tag using the style keyword.
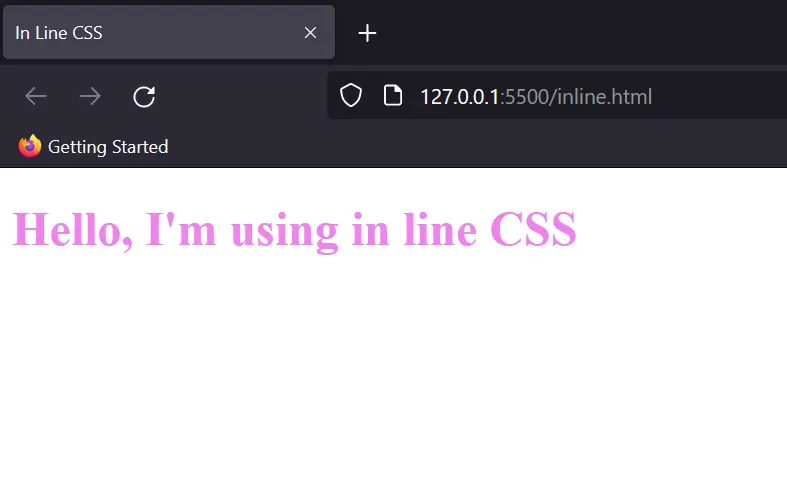
Output:
This way minute styling of the HTML document can be easily done without any hassles.
But still, generally, this method of adding CSS is not advised as it can create confusion in the tags and thus decrease the readability of code.
Also, with this method of styling, you can’t use quotations within inline CSS. The quotations will be treated as the end of style and therefore stopping the block of code.
Internal CSS:
This method would sound similar to you because we used this method originally to write our first CSS code.
Let’s try that again using another property. Create a style tag in the head of the HTML document and write the following code.
This tag selects the body and performs 3 operations on the text written in the body. Therefore the output would look like this-
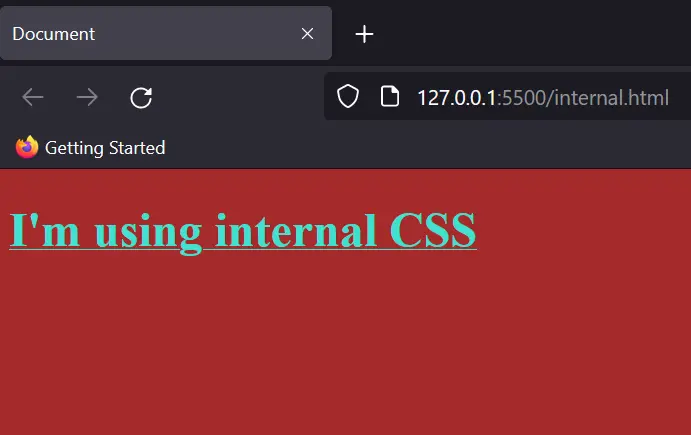
This way we can use CSS rules in the same document. But the major issue with this is, you can’t use these rules outside of the document, i.e, the scope of this style sheet is local. Therefore, let’s look at the most common method of adding the style sheet now…
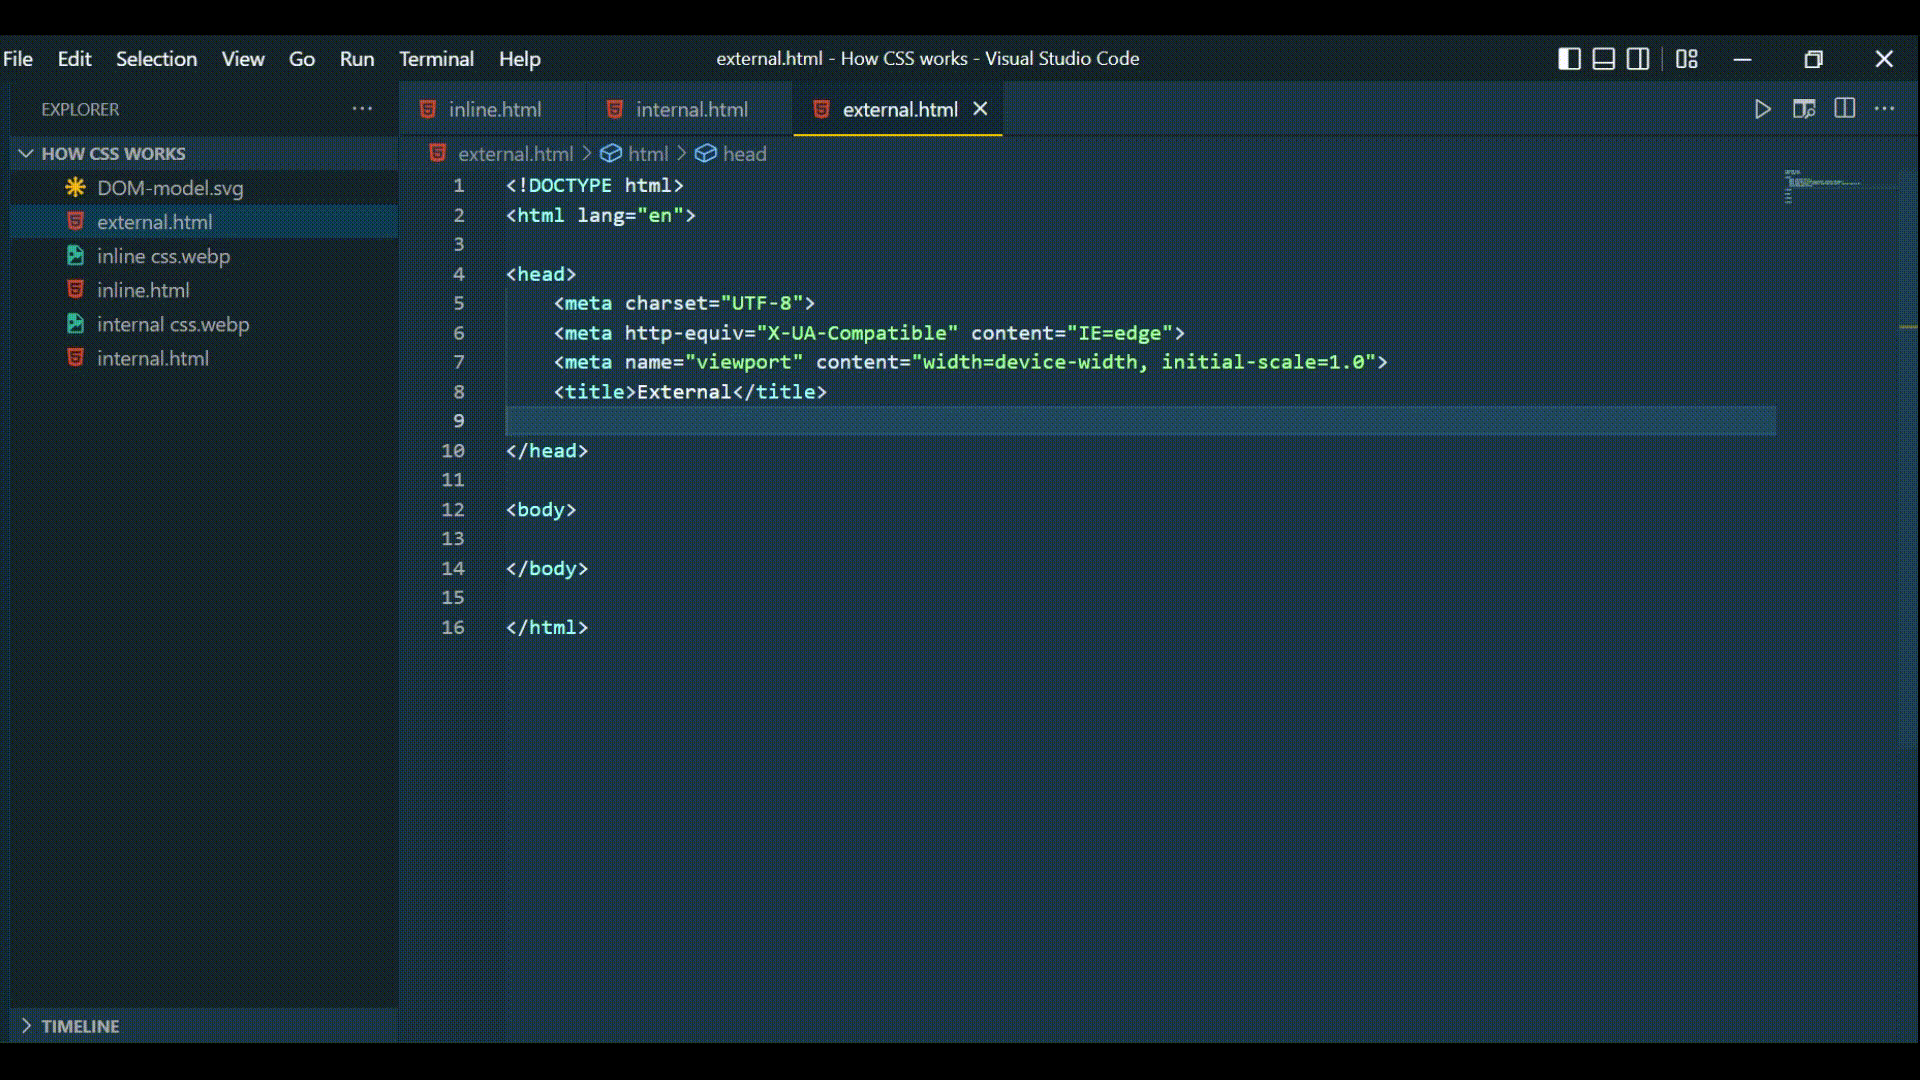
External CSS:
As the name suggests, in this method we explicitly create a file name style (name can be changed) with the extension ‘.css’. Then we link this file in the head tag of the HTML document.
This style sheet can be linked with any number of documents thus making it easy to use everywhere.
Let’s look at the implementation of the same. First, you need to create a file with the name “style.css” in the same folder where your HTML file is present. Later using the following command in the Head tag the file would be linked with the HTML document.
Here, “rel” defines the relationship between a linked resource and the current document, and “style.css” is the file we have created. Right now my file is already in the same directory as the HTML file so I don’t need to give the absolute path.
If you’ve created your “style.css” somewhere else, please give the path accordingly.
This way we can link CSS externally. But you’re on Code With Harry’s website, so here’s a shortcut for you to reduce the steps of doing so.
As you can see, I used the basic functionality of VS code and directly created a file called “style.css”. (I used ctrl+click to open the popup bar)
These were some ways in which you can link your CSS to your HTML file. But as a rule of thumb, external CSS is the best method to do so.
Ways to add CSS
So, there are mainly three ways to add CSS to any HTML document. One of the ways, we have already seen.
Inline CSS:
In this method, we can simply add CSS to the particular HTML tag using the style keyword.
Output:
This way minute styling of the HTML document can be easily done without any hassles.
But still, generally, this method of adding CSS is not advised as it can create confusion in the tags and thus decrease the readability of code.
Also, with this method of styling, you can’t use quotations within inline CSS. The quotations will be treated as the end of style and therefore stopping the block of code.
Internal CSS:
This method would sound similar to you because we used this method originally to write our first CSS code.
Let’s try that again using another property. Create a style tag in the head of the HTML document and write the following code.
This tag selects the body and performs 3 operations on the text written in the body. Therefore the output would look like this-
This way we can use CSS rules in the same document. But the major issue with this is, you can’t use these rules outside of the document, i.e, the scope of this style sheet is local. Therefore, let’s look at the most common method of adding the style sheet now…
External CSS:
As the name suggests, in this method we explicitly create a file name style (name can be changed) with the extension ‘.css’. Then we link this file in the head tag of the HTML document.
This style sheet can be linked with any number of documents thus making it easy to use everywhere.
Let’s look at the implementation of the same. First, you need to create a file with the name “style.css” in the same folder where your HTML file is present. Later using the following command in the Head tag the file would be linked with the HTML document.
Here, “rel” defines the relationship between a linked resource and the current document, and “style.css” is the file we have created. Right now my file is already in the same directory as the HTML file so I don’t need to give the absolute path.
If you’ve created your “style.css” somewhere else, please give the path accordingly.
This way we can link CSS externally. But you’re on Code With Harry’s website, so here’s a shortcut for you to reduce the steps of doing so.
As you can see, I used the basic functionality of VS code and directly created a file called “style.css”. (I used ctrl+click to open the popup bar)
These were some ways in which you can link your CSS to your HTML file. But as a rule of thumb, external CSS is the best method FS
CSS Comments
CSS comments are the same as what you must have learnt in any technical language. It is written to explain the code and is helpful for the users who read that code so that they can understand it easily.
Comments are ignored by browsers, and the syntax to write them is:

Comments